Friday, February 21, 2014

Getting mouse position within QAbstractItemView

Spent a few hours trying to make a presenter for a context menu that I am making within my UI. What I wanted to do was to allow for the context menu to be dynamic to what it appears above, regardless of what is currently selected. The problem I faced was that I needed to get the position of the mouse, and then map that global position to the view that I am using, and get the index of the model that is at the position I am looking at.

In order, here is how I proceeded.

When I create the context menu for a view, there is signal triggered, that emits a QPoint of where the mouse has been clicked:
...
# Connect the signal and the slot
self.view_context_menu = QtGui.QMenu()
self.view.customContextMenuRequested.connect(self.show_view_context_menu)

# The function to show the menu
def show_view_context_menu(self, pos):
    # We need to take the point we got from the signal, and map it to the world
    mapped_point = self.view.viewport().mapToGlobal(pos)
    # Now show the menu in the global space
    self.view_context_menu.exec_(mapped_point)
All seems well and simple, we got our menu, and we displayed it. But now, I want to get the index that might be at that point, and change the context menu accordingly. Lets say for now, I just want to see if the index is a valid one or not.
...
# Connect this to run right before the menu appears
self.view_context_menu.aboutToShow.connect(self.set_menu_action_states)
...

def set_menu_action_states(self):
    point = QtGui.QCursor.pos()
    index = self.get_item_at_point(point)
    print index.isValid()

def get_item_at_point(self, point):
    return self.view.indexAt(point)
Seems straightforward. However, what happens here, the point we get with QtGui.QCursor.pos() is in the world space of our monitor(s). So, whenever you will be trying to run this code, you will pretty much never get a valid index, because, as far as the view is concerned, you are not within it. So to solve this issue one has to transform the cursor position back into the view's coordinate system. But, you have to also remember something - all views in QT inherit the QAbstractItemView class, which in turn inherits the QAbstractScrollArea. What this means, is, the coordinate system of the actual view widget is a bit different then what we get when we are displaying the menu with customContextMenuRequested. The scroll area creates little widgets to drive the area display if some items in your view are hidden, allowing, well, for scrolling. Additionally, there are headers that the view posses, and those are different from what we see within the rest of the view. To be exact, everything we see withing the view, such as the view's items, are all sitting within the view's viewport coordinate system. If one has paid attention when we were showing the menu, we use the self.view.viewport().mapToGlobal() function to determine where the menu should appear. We have to do the same, but in reverse, when we are trying to find the indices under our mouse. So the corrected function looks like this:
def get_item_at_point(self, point):
    mapped_point = self.view.viewport().mapFromGlobal(point)
    return self.view.indexAt(mapped_point)
And that's it!

Tuesday, February 18, 2014

Alembic Maya - Edge Crease Export

Recently I encountered a request from our Rigging TD to see how we may be able to export meshes in Alembic format with edge crease information from Maya. Unfortunately, Alembic is still quite poorly documented in one single place, so it takes a bit of time to put all the information together to figure out how certain things are done. One of the things I ended up having to do was to actually traverse the AlembicExporter for Maya to learn how certain export processes work. The main Object that we need to look at to see how Alembic finds crease data is MayaMeshWrite.cpp. In this Object, if we look at lines 288-324, the constructor of the MayaMeshWriter object, we can see this chunk of code:
// check to see if this poly has been tagged as a SubD
MPlug plug = lMesh.findPlug("SubDivisionMesh");
if ( !plug.isNull() && plug.asBool() )
{
    Alembic::AbcGeom::OSubD obj(iParent, name.asChar(), iTimeIndex);
    mSubDSchema = obj.getSchema();

    Alembic::AbcGeom::OV2fGeomParam::Sample uvSamp;
    if ( mWriteUVs )
    {
        getUVs(uvs, indices);

        if (!uvs.empty())
        {
            uvSamp.setScope( Alembic::AbcGeom::kFacevaryingScope );
            uvSamp.setVals(Alembic::AbcGeom::V2fArraySample(
                (const Imath::V2f *) &uvs.front(), uvs.size() / 2));
            if (!indices.empty())
            {
                uvSamp.setIndices(Alembic::Abc::UInt32ArraySample(
                    &indices.front(), indices.size()));
            }
        }
    }

    Alembic::Abc::OCompoundProperty cp;
    Alembic::Abc::OCompoundProperty up;
    if (AttributesWriter::hasAnyAttr(lMesh, iArgs))
    {
        cp = mSubDSchema.getArbGeomParams();
        up = mSubDSchema.getUserProperties();
    }
    mAttrs = AttributesWriterPtr(new AttributesWriter(cp, up, obj,
        lMesh, iTimeIndex, iArgs));

    writeSubD(uvSamp);
}
In the code, you may notice that the exporter is looking for the plug "SubDivisionMesh" in the mesh that is being parsed. Now, when I looked at this the first time, I thought that the tag might be added when you use an actual SubD meshes created in Maya. But, alas, in Maya 2014, the support for the SubD meshes has been changed, and you no longer can even create Subdivision primitives...

After a few attempts I realized that the SubD meshes that I got converted from PolyMeshes were not containing the "SubDivisonMesh" plug that the exporter was looking for.

Over the weekend the Rigging TD that asked me to look into this, had a look as well, and saw what I was missing this whole time - the flag "SubDivisionMesh" was a bool tag that the user was supposed to add him/herself! And sure enough, as soon as you add the tag to the mesh (NOTE: Add the tag to the Shape node of the mesh, NOT the transform node. But export the Transform node. Makes sense, right??? If so, lucky you, cause I don't get the point...:( ) and export it, the mesh is exported using Alembic's OSubD and OSubDSchema, which is capable of storing the edge creases and corners, as per Alembic docs. The creases are exported in MayaMeshWriter::writeSubD function, in lines 834-862:
std::vector <Alembic::Util::int32_t> creaseIndices;
std::vector <Alembic::Util::int32_t> creaseLengths;
std::vector <float> creaseSharpness;

std::vector <Alembic::Util::int32_t> cornerIndices;
std::vector <float> cornerSharpness;

MUintArray edgeIds;
MDoubleArray creaseData;
if (lMesh.getCreaseEdges(edgeIds, creaseData) == MS::kSuccess)
{
    unsigned int numCreases = creaseData.length();
    creaseIndices.resize(numCreases * 2);
    creaseLengths.resize(numCreases, 2);
    creaseSharpness.resize(numCreases);
    for (unsigned int i = 0; i < numCreases; ++i)
    {
        int verts[2];
        lMesh.getEdgeVertices(edgeIds[i], verts);
        creaseIndices[2 * i] = verts[0];
        creaseIndices[2 * i + 1] = verts[1];
        creaseSharpness[i] = static_cast<float>(creaseData[i]);
    }

    samp.setCreaseIndices(Alembic::Abc::Int32ArraySample(creaseIndices));
    samp.setCreaseLengths(Alembic::Abc::Int32ArraySample(creaseLengths));
    samp.setCreaseSharpnesses(
        Alembic::Abc::FloatArraySample(creaseSharpness));
}
Another thing to note: the "SubDivisionMesh" plug does not need to be added to the export Attributes list in the Alembic Exporter or the script function AbcExport. The plug is searched for in the MayaMeshWriter constructor, and so any mesh object being exported will be checked for the presence of this flag.

Hopefully this saves someone out there the time it took me and my colleague to look all this up!

I'll keep writing more as I dig deeper into Alembic, and Alembics exporter for maya, so perhaps this blog will live again! Yay!

Wednesday, February 20, 2013

Storing attribute values with Maya API

This problem occurred as I was working on a tool that created attributes via maya api, and I had to set certain values on those attribs, and as I did so, I would save the file, and then re-open it, to find that the values I set were not being saved. Here is my original code:
import maya.OpenMaya as om
import maya.OpenMayaAnim as oma

depFn = om.MFnDependencyNode()
setObj = depFn.create("objectSet", "SaveLoadAnim")
uAttr = om.MFnUnitAttribute()

startAttr = uAttr.create("Start", "s", om.MFnUnitAttribute.kTime, oma.MAnimControl.minTime().value())
uAttr.setStorable(True)
uAttr.setKeyable(False)

endAttr = uAttr.create("End", "e", om.MFnUnitAttribute.kTime, oma.MAnimControl.maxTime().value())
uAttr.setStorable(True)
uAttr.setKeyable(False)

dgModifier = om.MDGModifier()

dgModifier.addAttribute(setObj, startAttr)
dgModifier.addAttribute(setObj, endAttr)

dgModifier.doIt()

If you run this code in maya, you'll notice that a set is created, and in the "Extra Attributes" there are 2 MTime attributes for "Start" and "End". They should be set as the current values of your scene's start/end. Now save this file somewhere, and re-open it. You'll notice that the values are now both set to 0... This quite confused me as I set the default value on the attributes creation as well as set the "storable" value to True...

After some digging around and talking to people about the issue, a colleague suggested that it might be the actual DG evaluation that might be causing the problem in setting this value to be stored with the attribute. His theory led me to think that it might be the case that DGModifier isn't flagging the default value as an actual value to be stored to the memory of the attribute as the DG isn't marked dirty on the attributes creation. And if it's not marked "dirty", the actual process of setting the attrib value inside the attribute itself just doesn't occur.

To test this idea I changed my code around a little, and - voilà! - it worked. So here is my final code:
import maya.OpenMaya as om
import maya.OpenMayaAnim as oma

depFn = om.MFnDependencyNode()
setObj = depFn.create("objectSet", "SaveLoadAnim")
uAttr = om.MFnUnitAttribute()

startAttr = uAttr.create("Start", "s", om.MFnUnitAttribute.kTime)
uAttr.setStorable(True)
uAttr.setKeyable(False)

endAttr = uAttr.create("End", "e", om.MFnUnitAttribute.kTime)
uAttr.setStorable(True)
uAttr.setKeyable(False)

dgModifier = om.MDGModifier()

dgModifier.addAttribute(setObj, startAttr)
dgModifier.addAttribute(setObj, endAttr)

dgModifier.doIt()

startPlug = depFn.findPlug(startAttr)
endPlug = depFn.findPlug(endAttr)

startPlug.setMTime(oma.MAnimControl.minTime())
endPlug.setMTime(oma.MAnimControl.maxTime())

Cheers,

DK

Friday, December 7, 2012

Alternative to maya.standalone

Recently I had a challenge to write a tool that would export scene information of a maya file. I had the tool working for a while, however it needed to have maya GUI open so as to be able to load the files that it needed to export. The problem I faced this time around was the need for the exporter to work in the background as it needed to open a different file to the one currently being used. From the get-go I wanted to avoid using mayabatch as I didn't want to go the MEL path. After some research, the alternative that I found was maya.standalone module. All seemed fine and dandy, but after some time testing this module, I found that there was a major drawback to maya's standalone module. The very problem is that as soon as you try to load any file that utilizes Mental Ray, or just loads the Mayatomr.mll plugin, the remote maya crashes. There are alternatives to bypass that, but it basically means making sure that the file you are loading in no way requests for that plugin. If you are using ".ma" files, one way is to make sure that there is no requirement request for the Mayatomr.mll. Just search the file in a text editor (of course only works if you are using a maya ASCII '.ma' format), and delete the line if it is there. However, keep in mind that if you do have something in the scene that requires that plugin, you will get errors, and many things might become unstable and rather unpredictable. In my case, I could not bypass the MR issue. We are using MentalRay, and there is no way for me to go through nearly a 100 assets and adjust every one of them. Being desperate I started googling everywhere for a possible alternative. I did notice that some people mentioned the use of pymel for their batching, but unfortunately noone ever clarified what they meant, and how exactly they utilized pymel. I used python's subprocess module to call for a python script to be run by mayapy. Here is what the call looks like:
import subprocess
import dataExporter #this is the script I want to run remotely
import sys
import os.path

paths = sys.path
rootPath = None
for path in paths:
    if os.path.exists(path + "\\Maya.exe"):
        rootPath = path + "\\mayapy.exe"
        break

scriptPath = dataExporter.__file__
myVar = "Hello World"
command = '{0} {1} {2}'.format(rootPath, scriptPath, myVar)
mayaVar = subprocess.Popen(command, stdin=subprocess.PIPE,
                                   stdout=subprocess.PIPE,
                                   stderr=subprocess.PIPE)
subprocess.Popen.wait(mayaVar)
a, b = mayaVar.communicate()
if mayaVar.returncode:
    print b
else:
    print a

First of all, I need to give credit to Henry Foster for a wonderful post that allowed me to clarify the use of subprocess and how to get the data from it. Here is his original post.
Now I'll take a bit to clarify what I am doing in the code. The first part:
paths = sys.path
rootPath = None
for path in paths:
    if os.path.exists(path + "\\Maya.exe"):
        rootPath = path + "\\mayapy.exe"
        break
This piece of code simply figures out where your location for mayapy.exe is. Pretty straight forward. Now for some fun stuff:
scriptPath = dataExporter.__file__
myVar = "Hello World"
command = '{0} {1} "{2}"'.format(rootPath, scriptPath, myVar)
mayaVar = subprocess.Popen(command, stdin=subprocess.PIPE,
                                   stdout=subprocess.PIPE,
                                   stderr=subprocess.PIPE)
subprocess.Popen.wait(mayaVar)
output, errors = mayaVar.communicate()
if not mayaVar.returncode:
    print output
else:
    print errors
Here I am looking for the full path to the script I am going to run in the subprocess, and then initialize the subprocess itself. The "mayaVar" variable holds for us the output that that happens inside the subprocess. As you can see from the code, I am passing to the subprocess first the location of mayapy.exe, then the location of the script I want mayapy to run, and then I pass it the single variable that the script is going to accept. I also open up the PIPE from the subprocess to send and receive values between our mayapy. Then comes a rather important part of the script where I request the subprocess to wait for itself to finish the job. Now that part isnt' always necessary. However, my tool needed for the exported data to be available to continue, so I couldn't allow maya to just go on. If the wait method is not envoked, your subprocess will run just fine, but the output values from the mayaVar will not be available right away. In some cases, i.e. batch exporting, you probably don't even want to wait as you might be doing some other logic after the batch has been sent off. Keep in mind that invoking wait() will cause maya to stall and wait for the output from your subprocess and hence will not allow any user interaction during that time. Once my data is exported I check whether the process was a success at all, and if any errors were thrown. That is done via subprocess' "returncode": 1 - True, some errors have occured, 0 - False, nothing went wrong, all is good (I found this quite unintuitive at start, but got used to it). Now once your process is done, you can assign the subprocess outputs to some variables. And finally here is the actual variation of the 'dataExporter' file that can give you some sort of output:
import sys
import pymel.core as pm


def replyToMessage(message):
    reply = ""
    if message == "Hello World":
        reply = "Hello to you too!"
    elif message == "Goodbye":
        reply = "Leaving already? Ah well, take care!"
    else:
        reply = "I am sorry, not sure what you just said..."
    sys.stdout.write(reply)
    return reply


if __name__ == "__main__":
    replyToMessage(sys.argv[1])
By just importing the pymel.core you initialize a specialized maya.standalone. The 'sys.stdout.write' will write you the output that you will get back. Keep in mind, all of the feedback you get will be in string format. I do not think there is any way to pass more complex data between this script being run and the current maya session you are running as a user without any socket connection. Anyway, hope someone finds this helpful at some point! Till next time, DK

Monday, July 2, 2012

Some "Mind Glitches" about MFnSkinCluster and MPlug...

It's been a while since anything appeared here, but that is due mainly because in the last half a year I have quite seriously moved more and more towards the technical side of life in 3D, and so there weren't so many updates to show for drawing...

However, I now intend to write a little on what I am finding now that I am being more involved in the tools and plugin dev at my new job at Bron Studios.

I have lately been digging more and more into different areas of Maya's API, and there are certain things I am sure I am bound to forget and will need again some day (or perhaps someone else will be looking for the explanations, and maybe these will shed light on what might be going on).

My current endeavor is into creating a nice and solid vertex based skin saving/loading and transfer. As I was looking for different approaches to get the skin data out of a skinCluster, I obviously started down the path of using the MFnSkinCluster. However, I quickly discovered that the information that I get there is rather cumbersome as I need to actually do a full mesh component iteration on an objects vertices to get the weighting data. That is hardly a fast process, and so I tried looking for other possible solutions. I knew that there is ways of getting the data from the skinCluster via the regular Maya Python interface through the skinCluster attributes "weightList" and it's "weights" attributes. The way this attribute stores data is in a compound attribute which is basically a nested list. For each vertex index in the mesh there is a "weightList" entry associated with that index that stores the weights for that vertex. It can be accessed with something like this:

import maya.cmds as m

obj = 'skinCluster2'

items = m.getAttr (obj + '.weightList', mi = True)
for i in items:
    print i
    print m.getAttr (obj + '.weightList[%s].weights'%i)

This will return to you the index of the vert being parsed, as well as a list containing it's weights. However, the problem I encountered here is that to figure out which verts contain which influence objects, you need to do a fair amount of sorting: you will need to loop through the influences, get the verts that each influence affects, then sort them to group each verts' influences to form a coherent table. To me, this is as cumbersome as the MFnSkinCluster, and is also slower, as we aren't parsing through the API.

As I looked around, I sumbled on a wonderful page by Tyler Thornock that utilizes both the API and the attribute parsing to get the skin weights. But as I was going through his method, I started figuring out what each line did, why, and how (as I always tend to). You can find his code HERE. The following line is what got me thinking:
wPlug.selectAncestorLogicalIndex(vId, wlAttr)

I couldn't figure out what this "selectAncestorLogicalIndex" was for. But after digging around I found that this basically set a compound attribute to display a specific part of it's data. In other words, when Tyler was getting plug data from the "weightList" of the skinCluster, and then the "weights" (the wPlug), he needed to set the weights plug to display information for a specific weightList index. Since the wPlug contained all of the info for all of the weightLists, you can't just go through it as any other list. And so the "selectAncestoralLogicalIndex" is used to specify which part of the wPlug to parse.

To show it a little more practically, when MPlugs for the attributes were created:

wlPlug = skinFn.findPlug('weightList')

wPlug = skinFn.findPlug('weights')


...if you would try to check the amount of elements in wPlug with "wPlug.numElements()" Maya would actually crash. However, as soon as you set the LogicalIndex to be one of the verts, and tried to get that again you'd get a result of the amount of influences that vertex is affected by:

wlPlug = skinFn.findPlug('weightList')

wPlug = skinFn.findPlug('weights')

wlAttr = wlPlug.attribute()

wPlug.selectAncestorLogicalIndex(0, wlAttr)

print wPlug.numElements()


This is it for now, I am going to dig a little further, but hopefully after writing this, I will not forget how it works!

Sunday, November 27, 2011

New Blog

For anyone interested, i also started a new Tumblr blog that i will use primarily for inspirational stuff, posting things that grabbed my attention. So far i am finding Tumblr super user friendly, but as i have quite a bit already here, i do not want to ditch blogspot just yet...
Anyway, check it out:
http://derangedartisan.tumblr.com

Back in business!

Well, it's been a while, but I am back to drawing again. Here are some sketches i did after going to CTNX, which was an absolute blast. I think I have inspiration to spare for months! Gotta work hard now, and get the animations done!


Also, here are progress reels for both my iAnimate Workshop 1 that I finished back in May, and Workshop 2, which I finished in August. Currently finishing off a dialog piece for Workshop 3, but that I'll post later, once it's actually done:)


Wednesday, March 2, 2011

A small Update

So, once again, I've been silent for ages. I tend to read a lot of other people's blogs, but I seem to forget to actually do something about my own. Well here are a few new things that I did in the last while:

Also, I have actually started on my way to animation! I have enrolled into the new school created by the one and only Jason Ryan, iAnimate.net, and have been doing my Workshop 1 for the last 2 months. Here are a few things to show my progress. Hope you enjoy!

A Ball Bounce:

A slightly more fun ball bounce:

Different Weights exercise:

TOTS (Thing On The Spring) Jump:

And this is the latest anim I am working on, so it is still a WIP:


That's it for now! Time to get more things going!

Wednesday, February 9, 2011

In beautiful Vancouver, and just got my Wacom back!

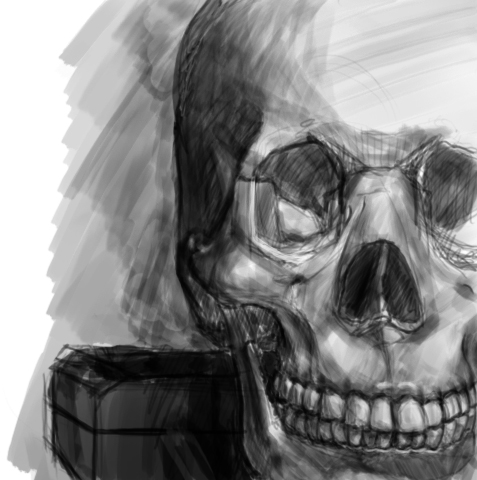
As a celebration for getting my Wacom Tablet back with all my other stuff from Germany, I decided to dedicate a little bit of time to the neglected child and did a small b/w painting study. Was definitely fun, and I am sure I will attempt to do the same thing again, but in color. Hope you enjoy!

Thursday, January 20, 2011

Felipe Nogueira - Character TD Reel

Thought I should share the awesome work a buddy of mine, Felipe Nogueira, has done. Very, very impressive reel! Looking forward where this guy ends up being:)